UIAlertController 🚩🌱
你知道 UIAlertView、UIActionSheet (以及它们各自的 delegate protocols) 在 iOS 8 中已经被废弃了吗?
这是真的。在你的代码中按住 ⌘ 点击 UIAlertView 或者 UIActionSheet,你就会看到最上面的注释:
UIAlertViewis deprecated. UseUIAlertControllerwith apreferredStyleofUIAlertControllerStyleAlertinstead.
你可能好奇为什么 Xcode 不直接警告你这个变化呢?别急,往下读:
@availability(iOS, introduced=2.0)
虽然类已经被废弃了,但在 @availability 属性中并没有表达出这一点。UIAlertView 目前还是能用的。
最开始的时候,UIAlertView 充满了无底线的让步,牺牲格式和设计正确性来顺应开发者的喜好。它的 delegate 类型是在初始化函数中注释的 (delegate:(id /* <UIAlertViewDelegate */)delegate),并且在 protocol 方法中实现了让人匪夷所思的概念——buttonAtIndex: 的 “clicked” 而不是 “tapped”;然后还提供了不限数量的参数来引入 otherButtonTitles,因此 button 的索引管理变得非常痛苦;一个 -show 方法也根本不考虑 view 的层级关系……类似的问题数不胜数。
UIActionSheet 也一样糟糕,但是开发者大多数时间里都没时间想起那些糟糕的使用方法,与其相关的抱怨特就更少了。
因此,介绍 UIAlertController 给大家,就好比派出军队解放一座被占领的城市一样。它不仅仅改进了那些让人头疼的 API,也开辟了一条为最新设备上 UIKit 特性适配的新路径。
本周文章的主题就是 UIAlertController,向大家展示如何替换旧的 alert,以及这些操作方法的高级扩展。
UIAlertController 同时替代了 UIAlertView 和 UIActionSheet,从系统层级上统一了 alert 的概念 —— 即以 modal 方式或 popover 方式展示。
UIAlertController 是 UIViewController 的子类,而非其先前的方式。因此新的 alert 可以由 view controller 展示相关的配置中获益很多。
UIAlertController 不管是要用 alert 还是 action sheet 方式展示,都要以 title 和 message 参数来初始化。Alert 会在当前显示的 view controller 中心以模态形式出现,action sheet 则会在底部滑出。Alert 可以同时有按钮和输入框,action sheet 仅支持按钮。
新的方式并没有把所有的 alert 按钮配置都放在初始化函数中,而是引入了一个新类 UIAlertAction 的对象,在初始化之后可以进行配置。这种形式的 API 重构让对按钮数量、类型、顺序方便有了更大的控制。同时也弃用了 UIAlertView 和 UIActionSheet 使用的delegate 这种方式,而是采用更简便的完成时回调。
新旧 Alert 方式对比
标准的 Alert 样式
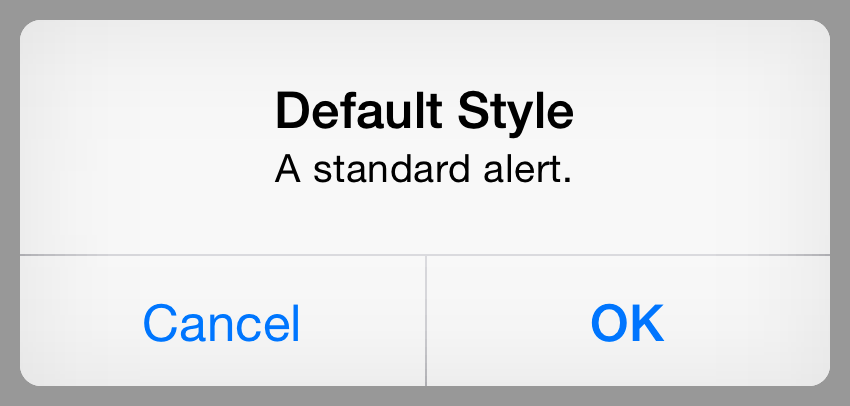
旧方法:UIAlertView
let alertView = UIAlertView(title: "Default Style", message: "A standard alert.", delegate: self, cancelButtonTitle: "Cancel", otherButtonTitles: "OK")
alertView.alertViewStyle = .Default
alertView.show()

// MARK: UIAlertViewDelegate

func alertView(alertView: UIAlertView, clickedButtonAtIndex buttonIndex: Int) {
    switch buttonIndex {
        // ...
    }
}
新方法:UIAlertController
let alertController = UIAlertController(title: "Default Style", message: "A standard alert.", preferredStyle: .Alert)

let cancelAction = UIAlertAction(title: "Cancel", style: .Cancel) { (action) in
    // ...
}
alertController.addAction(cancelAction)

let OKAction = UIAlertAction(title: "OK", style: .Default) { (action) in
    // ...
}
alertController.addAction(OKAction)

self.presentViewController(alertController, animated: true) {
    // ...
}
标准的 Action Sheet 样式
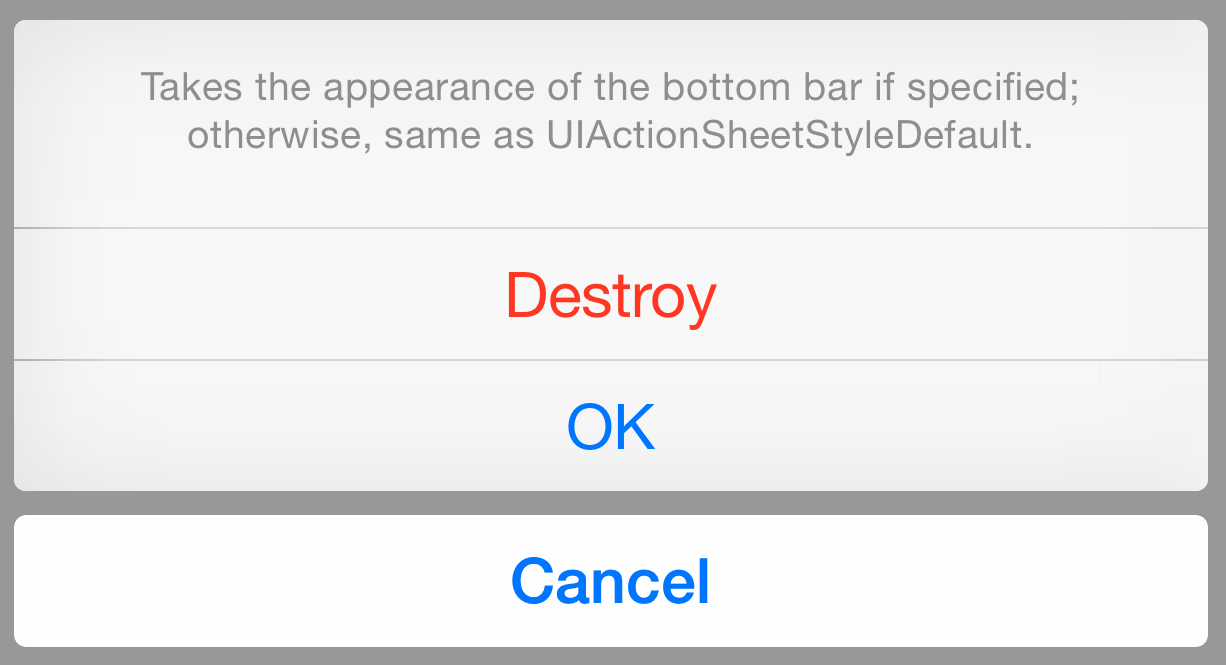
UIActionSheet
let actionSheet = UIActionSheet(title: "Takes the appearance of the bottom bar if specified; otherwise, same as UIActionSheetStyleDefault.", delegate: self, cancelButtonTitle: "Cancel", destructiveButtonTitle: "Destroy", otherButtonTitles: "OK")
actionSheet.actionSheetStyle = .Default
actionSheet.showInView(self.view)

// MARK: UIActionSheetDelegate

func actionSheet(actionSheet: UIActionSheet, clickedButtonAtIndex buttonIndex: Int) {
    switch buttonIndex {
        ...
    }
}
UIAlertController
let alertController = UIAlertController(title: nil, message: "Takes the appearance of the bottom bar if specified; otherwise, same as UIActionSheetStyleDefault.", preferredStyle: .ActionSheet)

let cancelAction = UIAlertAction(title: "Cancel", style: .Cancel) { (action) in
    // ...
}
alertController.addAction(cancelAction)

let OKAction = UIAlertAction(title: "OK", style: .Default) { (action) in
    // ...
}
alertController.addAction(OKAction)

let destroyAction = UIAlertAction(title: "Destroy", style: .Destructive) { (action) in
    println(action)
}
alertController.addAction(destroyAction)

self.presentViewController(alertController, animated: true) {
    // ...
}
新功能
UIAlertController 并不只是对已有的 API 做了清理,而是进行了标准化归纳。以前,预设的样式闲置有很多(swizzling 虽然可以提供更多的功能但还是有很大风险)。UIAlertController 让以前看起来很神奇的事情变为了可能。
带有警示按钮的 Alert
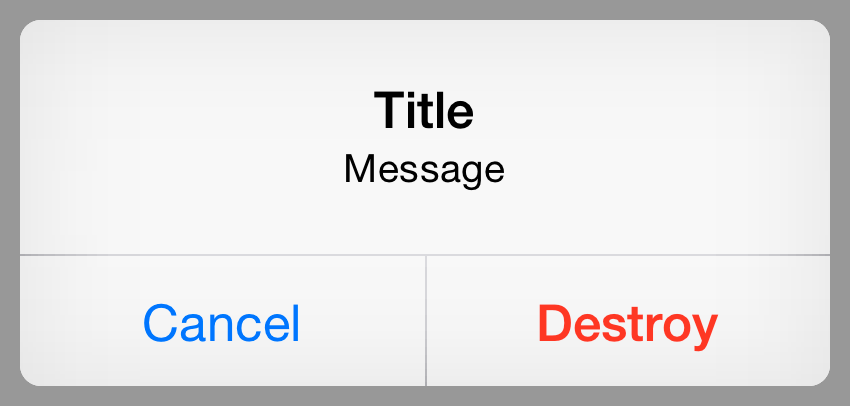
这种行为已经被 UIAlertActionStyle 所涵盖,共有三种类型:
.Default: 对按钮应用标准样式。.Cancel: 对按钮应用取消样式,代表取消操作不做任何改变。.Destructive: 对按钮应用警示性的样式,提示用户这样做可能会改变或删除某些数据。
所以想要对模态的 alert 加一个警示性的按钮,只需要加上 .Destructive 风格的 UIAlertAction 属性:
let alertController = UIAlertController(title: "Title", message: "Message", preferredStyle: .Alert)

let cancelAction = UIAlertAction(title: "Cancel", style: .Cancel) { (action) in
    println(action)
}
alertController.addAction(cancelAction)

let destroyAction = UIAlertAction(title: "Destroy", style: .Destructive) { (action) in
    println(action)
}
alertController.addAction(destroyAction)

self.presentViewController(alertController, animated: true) {
    // ...
}
大于 2 个按钮的 Alert
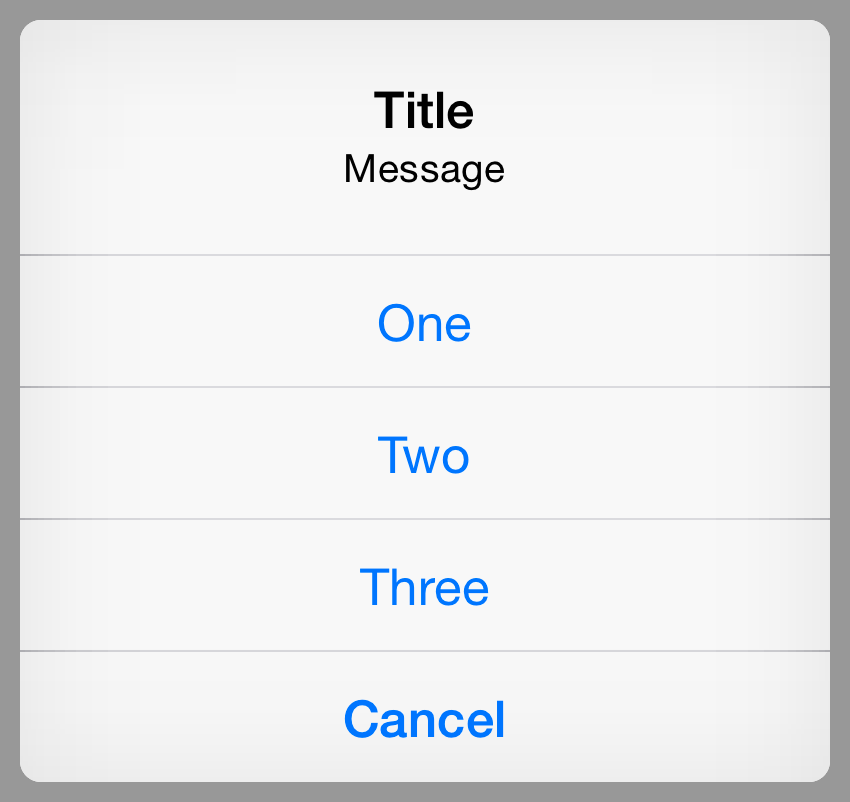
有 1 个或者 2 个操作的时候,按钮会水平排布。更多按钮的情况,就会像 action sheet 那样展示:
let oneAction = UIAlertAction(title: "One", style: .Default) { (_) in }
let twoAction = UIAlertAction(title: "Two", style: .Default) { (_) in }
let threeAction = UIAlertAction(title: "Three", style: .Default) { (_) in }
let cancelAction = UIAlertAction(title: "Cancel", style: .Cancel) { (_) in }

alertController.addAction(oneAction)
alertController.addAction(twoAction)
alertController.addAction(threeAction)
alertController.addAction(cancelAction)
创建登录表单
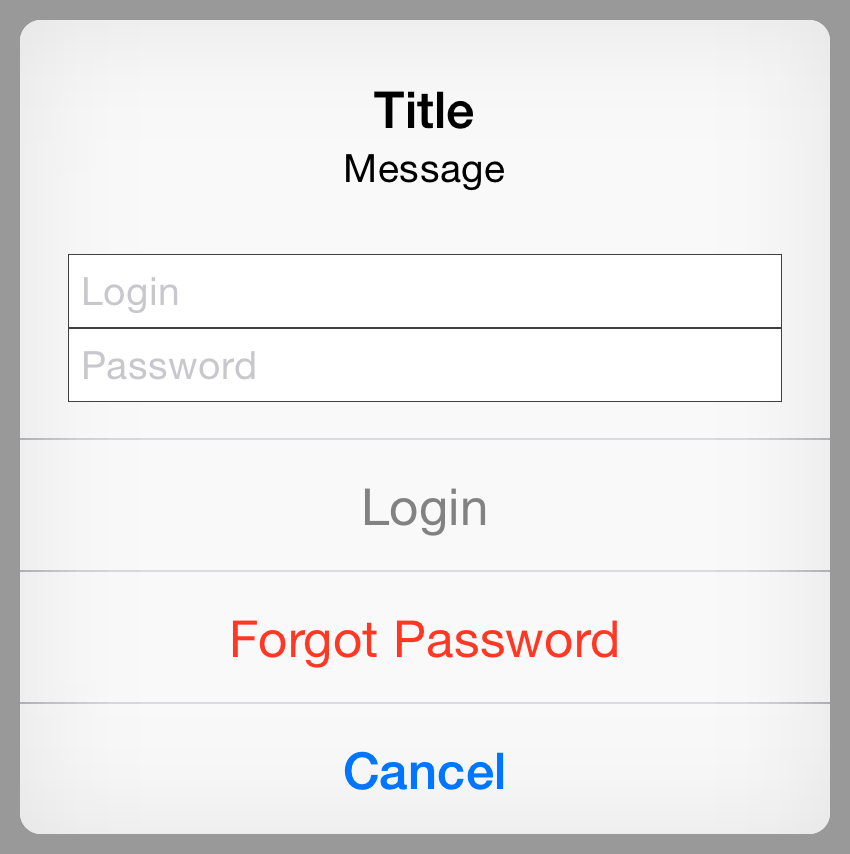
iOS 5 就为 UIAlertView 加入了 alertViewStyle 属性,将原本私有的 API 暴露出来给开发者使用 —— 像某些系统内建应用一样允许在 alert 中显示登录和密码框。
在 iOS 8 中,UIAlertController 则加入了 addTextFieldWithConfigurationHandler 方法:
let loginAction = UIAlertAction(title: "Login", style: .Default) { (_) in
    let loginTextField = alertController.textFields![0] as UITextField
    let passwordTextField = alertController.textFields![1] as UITextField

    login(loginTextField.text, passwordTextField.text)
}
loginAction.enabled = false

let forgotPasswordAction = UIAlertAction(title: "Forgot Password", style: .Destructive) { (_) in }
let cancelAction = UIAlertAction(title: "Cancel", style: .Cancel) { (_) in }

alertController.addTextFieldWithConfigurationHandler { (textField) in
    textField.placeholder = "Login"

    NSNotificationCenter.defaultCenter().addObserverForName(UITextFieldTextDidChangeNotification, object: textField, queue: NSOperationQueue.mainQueue()) { (notification) in
        loginAction.enabled = textField.text != ""
    }
}

alertController.addTextFieldWithConfigurationHandler { (textField) in
    textField.placeholder = "Password"
    textField.secureTextEntry = true
}

alertController.addAction(loginAction)
alertController.addAction(forgotPasswordAction)
alertController.addAction(cancelAction)
创建注册表单
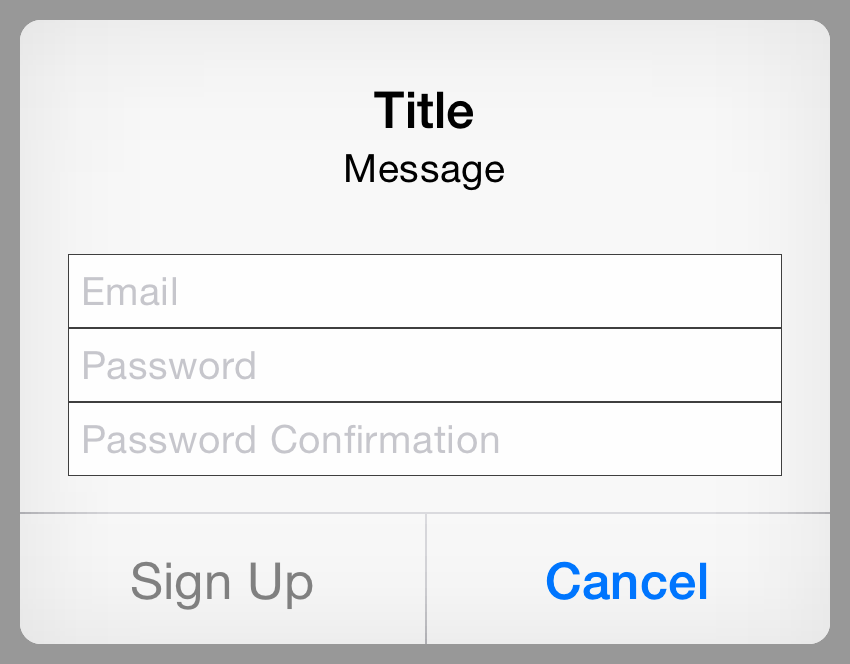
UIAlertController 想得比以前更周到一些,它提供了展示无限个输入框的权限,并且每一个输入框都可以根据需求进行自定义。这让仅在一个模态的 alert 中实现完善的注册功能成为可能:
alertController.addTextFieldWithConfigurationHandler { (textField) in
    textField.placeholder = "Email"
    textField.keyboardType = .EmailAddress
}

alertController.addTextFieldWithConfigurationHandler { (textField) in
    textField.placeholder = "Password"
    textField.secureTextEntry = true
}

alertController.addTextFieldWithConfigurationHandler { (textField) in
    textField.placeholder = "Password Confirmation"
    textField.secureTextEntry = true
}
虽然有了这些,但必须要说明的是,不用_矫枉过正_。不能因为你可以这样做,就代表你_应该_这样做。忘了这玩意吧,提供一个 view controller 来做注册功能吧,因为你本就应该这样做!
注意
如果试图向 alert controller 添加带有 .ActionSheet 属性的输入框,将会抛出异常:
Terminating app due to uncaught exception
NSInternalInconsistencyException, reason: ‘Text fields can only be added to an alert controller of styleUIAlertControllerStyleAlert’
同样的,向 alert 或 action sheet 添加一个以上的 .Cancel 按钮将会抛出异常:
Terminating app due to uncaught exception
NSInternalInconsistencyException, reason: ‘UIAlertControllercan only have one action with a style ofUIAlertActionStyleCancel’
除非另有声明,本文采用知识共享「署名-非商业性使用 3.0 中国大陆」许可协议授权。